Creating a Standout Photo Album with Fliplify: A Step-by-Step Guide
Introduction
In the age of digital photography, creating a personal photo album has never been easier. With Fliplify’s Flipbook Maker, you can transform your cherished memories into an engaging and dynamic digital photo album that stands out from the rest. In this article, we will explore several usage scenarios for creating a memorable photo album and provide step-by-step guidelines to make your album truly unique.
Usage Scenarios for Creating a Personal Photo Album
- Family Vacations: Capture and share the fun moments from your family trips, creating a photo album that will bring back fond memories for years to come.
- Wedding Celebrations: Compile photos from your special day, including the ceremony, reception, and related events, to create a photo album that preserves the joyous moments shared with your loved ones.
- Baby’s First Year: Document your baby’s first year with a photo album, capturing milestones like the first smile, first steps, and other memorable moments.
- High School Memories: Gather photos from high school events and sports games to create a photo album that captures the excitement and camaraderie of your formative years.
- Travel Adventures: Organize your photos from various trips into themed photo albums, such as “European Getaways,” “National Park Exploration,” or “City Escapes,” to relive your travels and share them with friends and family.
Step-by-Step Guide to Creating a Standout Photo Album with Fliplify
- Choose a usage scenario: Select one of the usage scenarios mentioned above or come up with your unique theme for your photo album.
- Sign up for Fliplify: Visit Fliplify’s website and sign up for an account to access the Flipbook Maker tool.
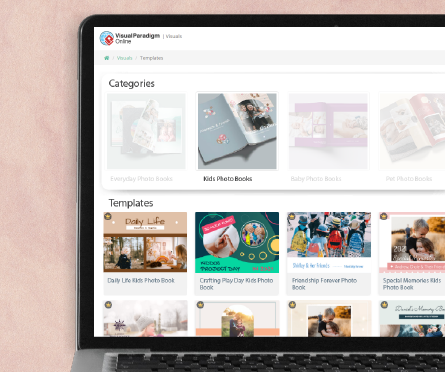
- Browse templates: Once you’ve signed up, browse through Fliplify’s library of templates and choose the one that best fits your photo album’s theme.
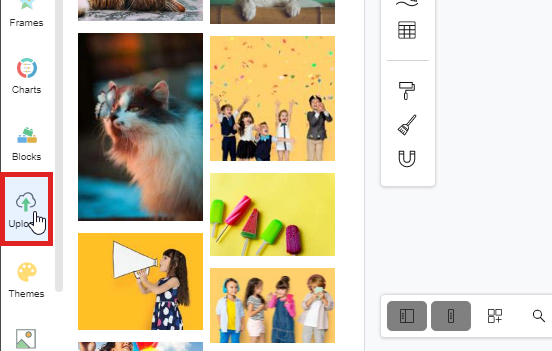
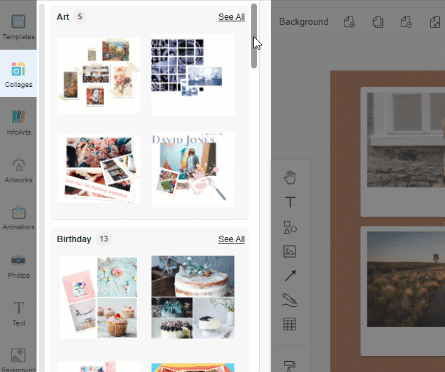
- Upload your photos: Click on the “Image” button to upload your photos from your device. You can also use the “Upload Media” button to access millions of icons and photos provided by Visual Paradigm for customization.
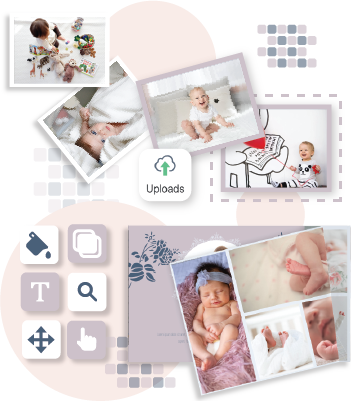
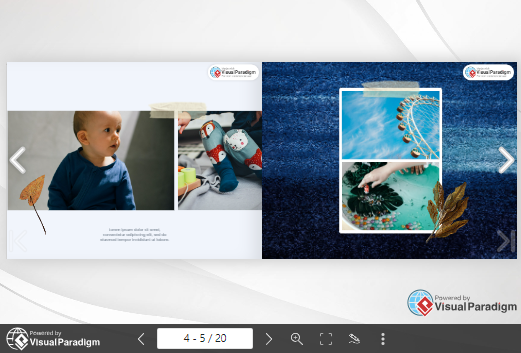
- Edit the page layout: Customize your chosen template by dragging and dropping elements, such as photos, text, and other design elements, into the editor. Feel free to add as many pages as needed to showcase all your memorable moments.
- Enhance with photo collages: Use the photo collage feature to create attractive arrangements of your photos. Learn more about creating photo collages in our article “Unleashing Your Creativity: The Versatility of Online Photo Collages for Individuals and Professionals.”
- Review and adjust: Take some time to review your photo album, making any necessary adjustments to the layout, design, and text content. Ensure that your album captures the essence of your chosen usage scenario.
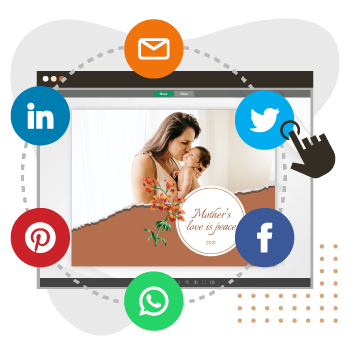
- Share your album: Once you’re satisfied with your photo album, share it with your friends and family, either through social media or by emailing them a link to your digital album.
Conclusion
Creating a personal photo album with Fliplify is an enjoyable and straightforward process that results in a unique and engaging digital photo album. By following the step-by-step guide and incorporating one of the usage scenarios listed above, you can create a photo album that truly stands out from the rest, preserving precious memories for years to come. Check it out now! You may also take a look of the photo album examples below.


